I’ll admit it. I love gear. I love 10-bit color space, 32-bit audio, 4k 120 fps, drones, gimbals, motorized sliders, and multicolored lighting; I love all of it.
Since I first started making videos, 90% of my money from YouTube goes right back into creating better videos. So, at this point, my gear is pretty good.
However, as I grow as a YouTuber, I’m sure this setup will change as I continue to try and improve. For now, however, I am thrilled with this setup.
If you guys don’t know me, my name is Zach, and I’m a fourth-year medical student in Philadelphia. This video will be mostly about my gear setup and how I film the main shots for my videos. When I first started on YouTube, I hunted down these kinds of videos from Casey Neistat, Matt D’avella, Ali Abdaal, and MKBHD. Even though those videos weren’t their most popular, I remember watching each of them about 3x over because I wanted to know how my YouTube idols made videos. I wanted, and still want to, be like them. I loved those videos, and they guided me on my first camera purchases ever. So here is my attempt at that video, collecting everything I’ve learned across my two years on YouTube.
Here is how I make my YouTube videos.
Camera
The first thing is the camera. I now have three of these.
Camera Body – Sony a7S III
I have that hooked up to a 50 mm Lens. I used to use an 85 mm lens but would have to position myself too far away from the camera. Also, I like the way the 50 mm lens looks better.
Lens – Sony FE 50mm F1.2
I have a couple of tripods; the main tripod I use for my videos is stable, lightweight, and has a significant fluid video head.
Tripod and video head – Sachtler Ace M System
Importantly, you need to monitor your shots while you are filming. For my main shots, I usually plug my camera directly into a regular computer monitor. Any monitor will do.
Computer Monitor – Acer SB220Q 21.5″
Recently, for my b-roll shots, I’ve been using this monitor that hooks onto the top of my camera. It works pretty well.
Extra Camera Monitor – FEELWORLD T7 7″ (annoyingly you also need to buy batteries for this separately)
Lighting
After good audio, good lighting is the most important thing for better videos (which are both after good content).
The first thing I use is an awesome key light and diffuser. I have played around positioning this farther away with more diffuse lighting for a less dramatic scene but have recently been happy with closer lighting that is softer for a more contrasty face.
Key Light – Aputure Light Storm C300d Mark II
Key Light Diffuser – Aputure Light Dome (34.8″)
Fill Light, Hair Light, Background Light – Godox SL150W II
Fill Light Diffuser – I usually don’t use a fill light as the reflection off the white is good enough, or the natural light from outside is good enough. Otherwise, I just use another light dome or change the key light to be more straight on.
Background Light Diffuser – Aputure Lantern Softbox (2.2′)
Color light for different backgrounds – Amaran P60c
Sneakily, a portable sound blanket contraption has become one of my most valuable video and audio assets. I love them so much that I built another one and will probably make another one soon. I did not come up with this; I completely copied this creation from the DSLR Video Shooter guy and built each one for less than ~$200, with most of the cost coming from the blankets. Importantly, I have one side white and one side black. If I want to reflect light and fill the other side of my face better, I will use the white side. If I want to create more contrast, I will use the black side
If you want to make these definitely check out his video, but to make one of these you will need:
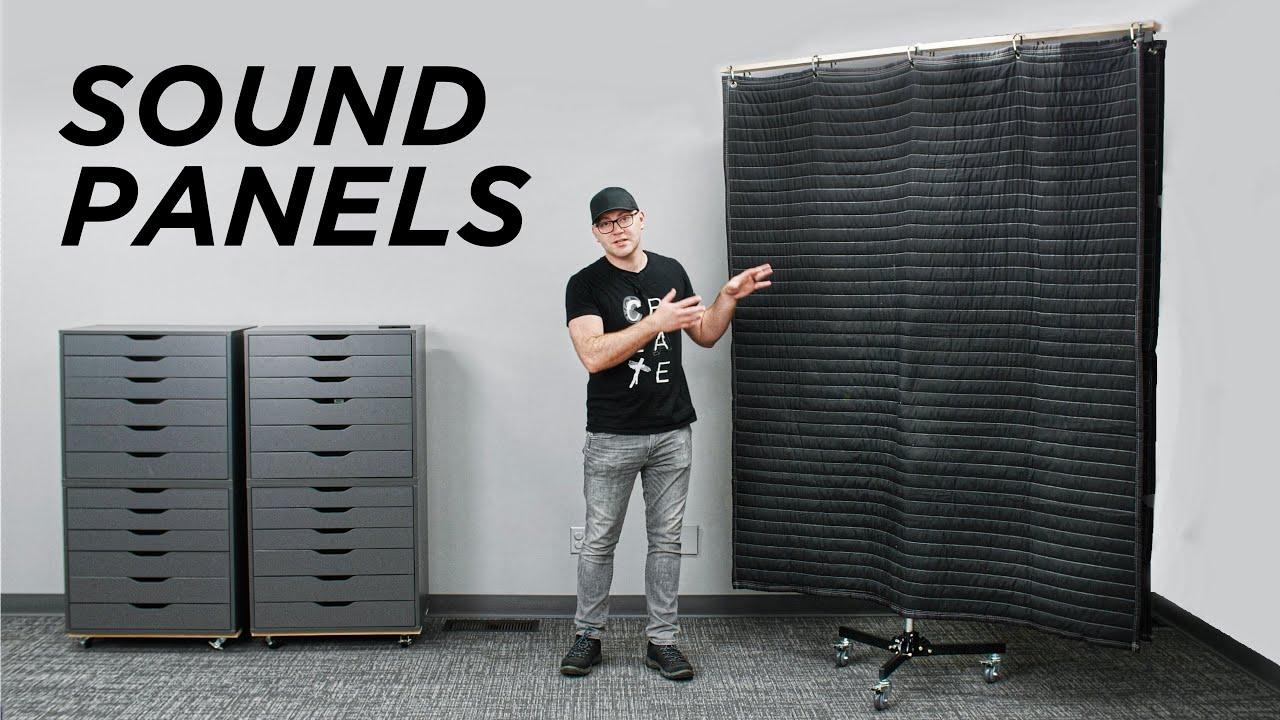
Sound Blanket x 2 – VB70G
Rolling Wheel Base – Impact Folding Wheeled Base
Adapter for rolling wheel base – Kupo TV to Motion Picture Adapter
You will also need: Power Drill
16x Carabiner Clips
The rest I got from Home Depot
- 1x 1/2 Coarse Thread Bolt (1-1/2″ long)
- 1x Course Thread Washer (2″ wide)
- 16x Eye Screws (#6 or 1-15/16-inch eye screws)
- 1x 6 foot board (oak 6′ x 4″ x 1″)
Audio
Having poor audio is the quickest way to get people to stop watching my videos. Recently, I’ve tried to upgrade my audio even more by getting a better microphone, using 32-bit audio, and adding sound blankets.
The other key thing I started doing is checking my audio before recording; simply plugging in monitoring headphones into my audio interface is so important. I’ll record some test audio to make sure everything is working together. Things I found out after using the headphones are to:
- Make sure I close all windows and doors
- Make sure I turn OFF the air conditioning
- Always use sound blankets
Microphone – Schoeps CMC641
C-Stand – Boom Arm-Photograph Stand
Audio Interface – Zoom F3
Headphones – ATH-M50X
2x Sound Blanket things.
I surround myself with the sound blankets and have the microphone as close to my mouth as possible without it coming into the shot.
The Set
My “set” is just my apartment. Recently I have been using closer shots for more dramatic scenes. However, usually, I make sure my background is nice and clean with a few plants.
I make sure nothing is distracting where my head is and like to have my head framed.
Then, I usually use one blue light on one side and one orange light on the other side.
B-Roll
Now, this is the fun stuff. These are probably my favorite shots to shoot—the B-roll.
- Slider – The Rhino slider has changed the game for me, I found the 42″ way too big, so I returned it for a 24″ slider. Then I just bought the particular motor and Arc II main piece.
- C-Stand for overhead shots –
- Drone – DJI Mavic Air 2
- Gimbal for moving shots – DJI RS 2
- Other Lenses – Sony 90mm FE Macro and Sony FE 16-35mm
That is everything I use right now to record my videos. However, I started making most of my videos with just my old Sony a6000. Starting is the most essential thing, so if you want to start on YouTube, get out there and create! Use your phone! Use anything!
If you are looking for a guide on where to start, many people have begun great and successful YouTube channels after taking my Beginner YouTube Course. I am proud of some of these students.
I started making YouTube videos with Final Cut Pro two years ago while in lockdown during Medical School. I had no idea how to record videos, let alone edit them. The internet wasn’t giving me answers, no guides, no tutorials. I was floating without guidance.
I wanted to know how to record professional videos, including mastering lighting, audio, and editing. I learned slowly. Nine months later, I had 100,000 subscribers. It was insane. My dream came true.
In this course, I’ll go in-depth for four-plus hours on everything production, including camera setup, lighting, and how to record clean audio. Then, we will get into creating the final product on Final Cut Pro.
I made the course I wish I had when I started making YouTube videos. I’m not going to lie, it won’t be easy, but if you put in hard work, consistently something crazy can happen.
So, if you want to get started on making next-level YouTube videos click the link and start changing your life today.